What is a landscape picture?
When I hear the somebody say the word landscape I immediately draw my mind to buildings and structures. However, i am aware that landscape isn't just isolated to building, and does in fact incorporate other aspects such as nature and the sky.
The first 10 words that pop up into my mind are landscape architect, shapes, constructions, cityscapes, colours, buildings, layers, nature, fixed frame, subjects.
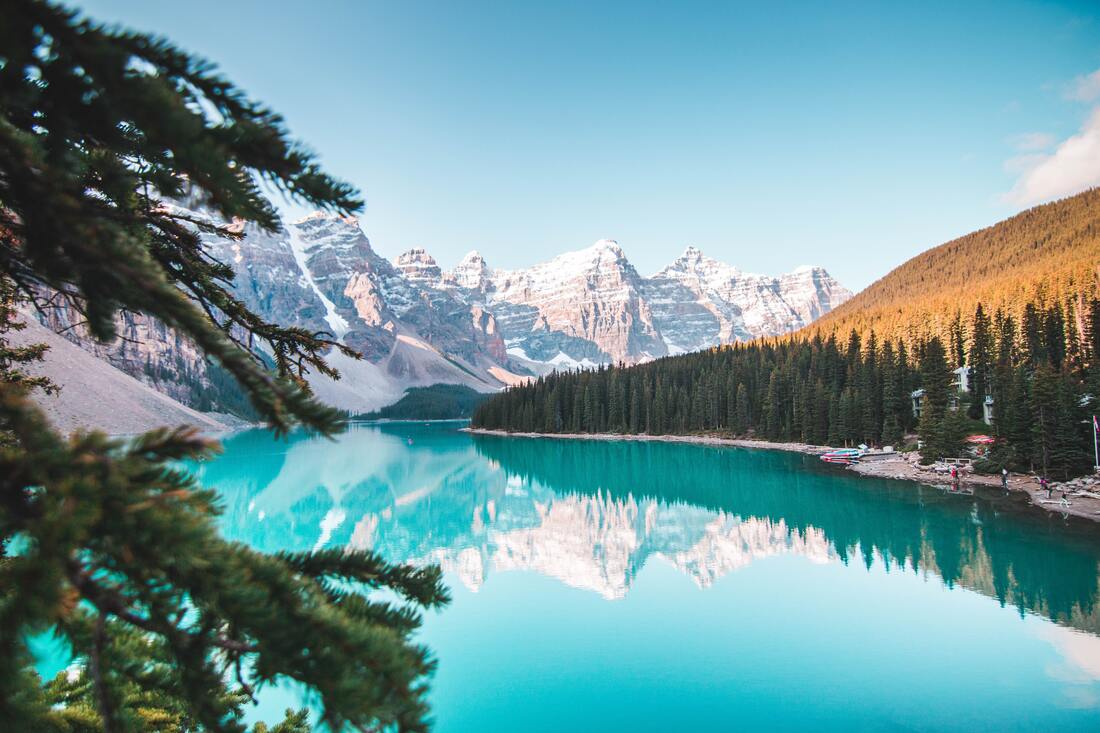
When I do a simple google search of the word landscape and look at the images i immediately see pictures of fast mounting and lakes with breath taking sunsets behind them. However, i am unable to see any buildings or cities on the google images.
My ideal landscape would be a vast cities with skyscraper an ideal places of theses would be cities such as London or New York. i love taking photos of the sky and it beautiful sunsets and the colours it becomes.
When looking outside of the window where i'm sitting at the moment I am directly looking at the opposite block building and can see people in other classes. On my phone I have a wide range of landscape pictures ranging from cityscapes to nature. This is because whenever i am out anywhere i love to take pictures of what i'm doing and they all add up to many sets of photos.
The first 10 words that pop up into my mind are landscape architect, shapes, constructions, cityscapes, colours, buildings, layers, nature, fixed frame, subjects.
When I do a simple google search of the word landscape and look at the images i immediately see pictures of fast mounting and lakes with breath taking sunsets behind them. However, i am unable to see any buildings or cities on the google images.
My ideal landscape would be a vast cities with skyscraper an ideal places of theses would be cities such as London or New York. i love taking photos of the sky and it beautiful sunsets and the colours it becomes.
When looking outside of the window where i'm sitting at the moment I am directly looking at the opposite block building and can see people in other classes. On my phone I have a wide range of landscape pictures ranging from cityscapes to nature. This is because whenever i am out anywhere i love to take pictures of what i'm doing and they all add up to many sets of photos.
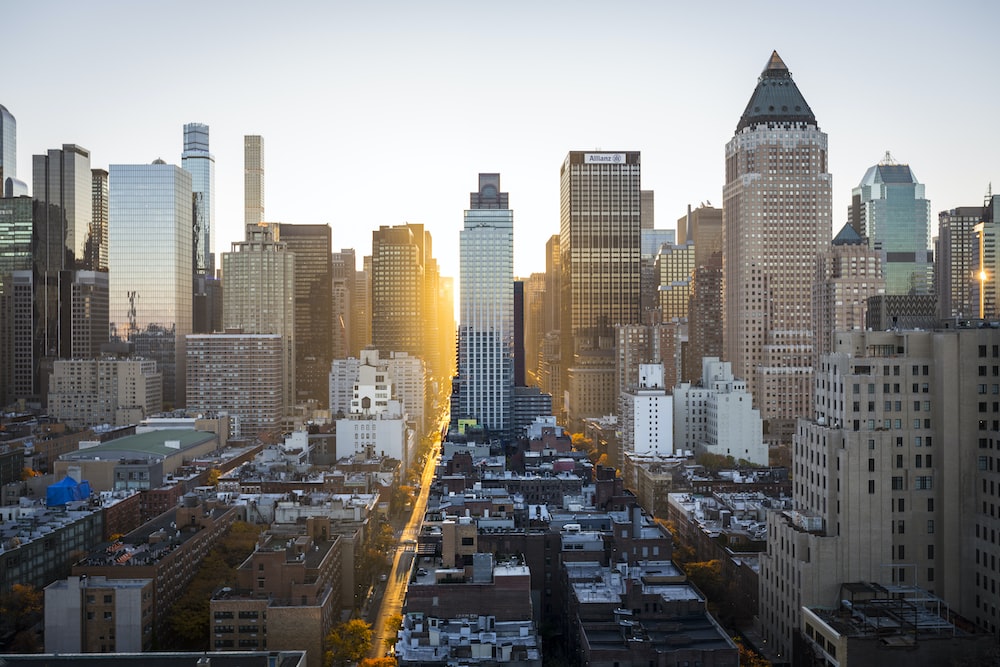
Google searched images...


What is the purpose of a landscape picture

|
|
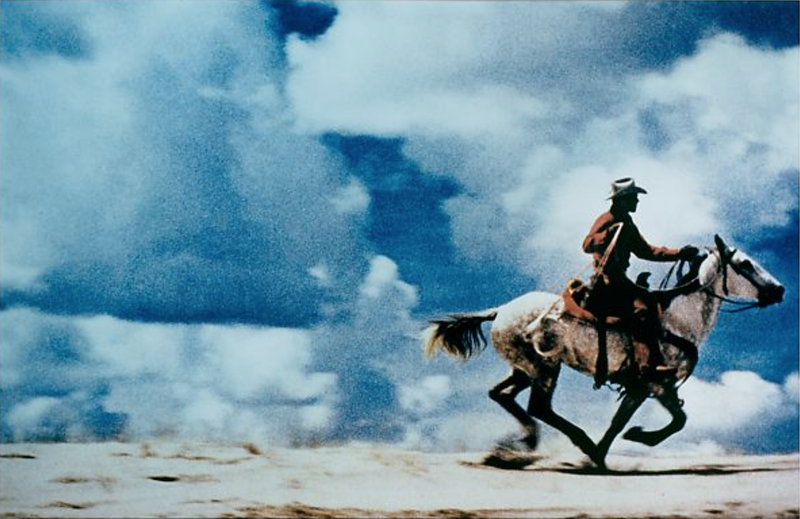
In the first pictures we can see a secluded and barren terrain which has very little features towards it. When i was looking at this photograph i was looking closely at the things on the road. At first i thought it was rocks or debris left on the road, however after doing some research i am now aware that its actually cannons on the road and were left there after battle. In the second image i can see a man riding his horse also through a barren piece of land however this is taken while there is movement and a snap shot of an animal and human. Additionally when looking at the second image i am immediately drawn to the overpowering ominous background which for me engulfs the picture. The main difference between the two images are that with the first picture we see very dull and blank colours which for me makes the image feel repetitive and makes me feel like the different aspects all fall into one. However contrasting this the second image have very bold colours and is extremely saturated to emphasis the colours especially the blue and white in the background. In the first image a key detail i was able to pick out was how the picture is presented through the rule of thirds and is split into three different sections. I think this was done on purpose because they wanted to split the two sections and make us look at them individually instead of one picture however like i said earlier the similar colours bring the image back into one. With the second imageI noticed that because they had really saturated the colours it also emphasised the mans red top which clashes with the rich blue clouds. I think this was done to bring attention to the man on the horse and makes us the views feel like the image is more balanced even though the red distracts and draws away the attention of the clouds. Both these pictures are similar as they present the landscape the same way. For example with both images theres a sense that they are at the end of the world and there's no way further this is presented with both images with the fact that the horizon stops very suddenly and dramatically. This makes the views think that theres no continuation and theres no way further.
Tanja Deman


Tanja Deman is a visual artist who does a wide range of collages, photographs and public artwork. However what we are focusing on today was the work she does in collages and how she mixes different styles of landscapes together. With her work she is very good at copping different subjects together without any relevance toward each other and creating a story from it. This is what really drew me toward her work and style. The majority of Tanja's work is heavily photoshopped with her mixing nature with structures and then turning it into black and white. This gives us the mood that its unnatural however the way Tanja composes the two aspects creates two powerful things mixing together very well. With the depth of her work it structures the mix between imagination and reality. This crossover is only effective because she is extremely intricate with the focus, motion, lighting, cropping and framing when editing her work. With her work there always feels like theres a dominant part of her photograph which strikes you as soon as you look at her photographs. For the three examples above the dominant part of the picture is always located centrally in the image and usually takes up most of the image. I think this is effective as it give the audience something to focus on and can really look in detail. I think the artists purpose when doing this is to bring together a world where nature and cityscapes can congregate together and create a powerful meaning behind them.
My Response...
|
|
Step 1 : Collage

Step 1 was to create a collage from the two images provided to us which created a mix of city scapes and nature coming together. The equipment used to do this was a scalpel, a cutting mat, and a glue stick. The reason we used a scalpel instead of scissors was because we were able to get a clean and more accurate cut instead and was a lot easier to move around the image with little pressure. With the city scape I decided to cut out a whole avenue from the image and some specific tall buildings. The reason for this was because I felt they were the key aspects of the image and held the most purpose out of the other buildings and sections in this particular image. In image 2 I was curtain that I wanted to add the vast mountains as i thought that it had the equal omniscient power that the tall buildings also holds. It made me feel like the image became more equal. An additional aspect that I wanted to add was the tree line in the image. This was added as it meant that it could lead into the image when all the other aspects were added. When i had cut out all the aspects i wanted I assembled them together in a pattern I thought was correct and added other aspects from other peoples prints which fully enhanced the image to its fullest. However when doing this I did unfortunately not get enough time to finished so the end product was slightly rushed but it still turned out okay.
Step 2 : Negative

After we converted are collages to acetate we went into the dark room and used some photographic paper to convert then into a negative photograph. The photographic paper is very light sensitive so we could only take it out of its packet on the red light. Once you have taken it out we had to position are acetate on top of the paper and put it under a light for 7-10 seconds. This converted the image onto are photographic paper and comes out with a dark background with all the subjects coloured white. After we put are photographic paper in developer for 1 minute which develops the image onto the page. Then we put transferred the image into stop for also 1 minute. Then the final chemical we put it into is fix for 1.5 to 2 minutes. Then the last process is to rinse off the chemical in water for a few minutes and let it dry. After putting the picture through this process it should come out looking something similar to my negative. In my final image I think it turned out very well and i think it turns the image to present it as ghostly and mysterious. However i would have liked it to be more detailed and this can be done by leaving it into the developer for less time.
Step 3 : Positive

After I had turned my collage into a negative it was time for step 3 of the process which was turning the acetate into a positive image. The process of turning it into a positive is very similar to when we turned it into a negative however the was some changes. When we were exposing the acetate on the photographic paper instead of putting it under the light for 7-10 seconds we put it under for 30 seconds. Then after that it's the same process with mixing the chemicals as the negative. We put it in the developer for 1 minute then the stop for a minute and finally the fix for a few minutes. Then rinse. This is what turns the image to look like a positive version of the acetate and not like a negative. When attempting my positive I struggled as it came out over developed. This was a result of putting the photographic paper in the developer for too long and if I was attempting this again I would leave it in for less time then before. What I do like about the image is that even though it came out with water marks at the bottom and top of the image it adds toward the image and I think brings focus towards the centre of the image and the main subjects. This presents a centre point for the image.
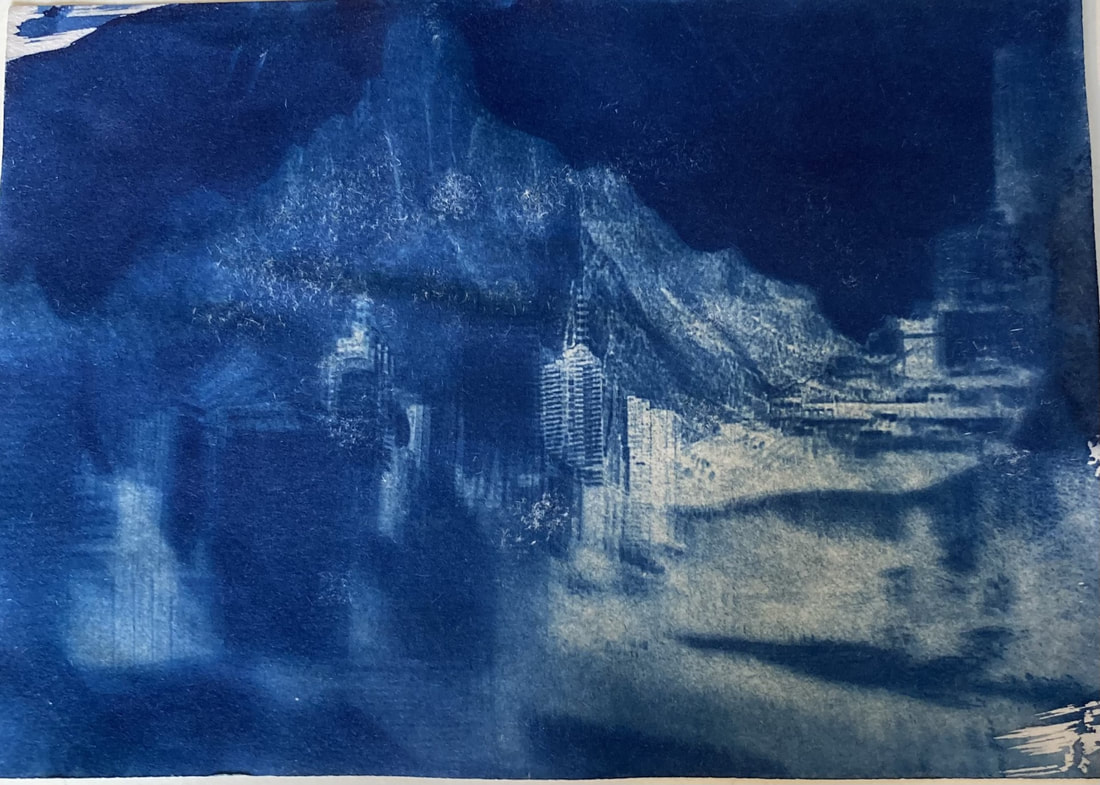
Step 4 : Cyanotypes
|

|
Are final manipulation of the collages was turning it into a cyanotype. Cyanotypes are made when an image is exposed by the sun and transfers the image from its acetate to its light sensitive paper. This process wasn't very challenging as I had practiced this in previous years but I wasn’t happy with my first attempt so I did a second attempt. With the first attempt we had to leave it in the light and the problem was I left it in the light for too long. But with the second attempt it came out much better and the was a lot more details to the different buildings and structures. After we had exposed the image onto the paper we had to go back upstairs and wash are images with water so that the image comes out. After this was left out to dry it should transfer and leave your image with a blue/white image. What I liked about this process was that its very unique and doesn’t follow the same process as any other way of manipulating an image. However its very easy to mess up and overexpose the image and you have to guess how long to keep it out by how sunny it is. This makes it easy for errors.
Step 4 : Mixing

With this step we had to take photocopies of all our work that we had done previously and mix them all together. This was our final step of our experiment. Once I had photocopied my images I had to cut the up and I did this by bunching my images together and then using the cutting machine I tried cutting my images into different sections but each time changing the size and shape of them to make them all unique from each other. While i was experimenting with different ways of organising my sections of images I wanted to make sure there was an even distribution of images and trying not to have two of the same bits together. I think it turned out pretty well and its hard to put together the original images with all the different sections however it presents a interesting illusion for the audience. If I were to change something I would make it look less cluttered and have more of a purpose as to why I was making it and what story I wanted the views to collect from this which I think I didn't achieve.
Out of focus landscapes
Out of focus landscapes are our new project which focuses on manipulation of the image which restricts the ability to see the image because it's blurred. Blur can be created many ways for example it can be because an object is moving at a vast pace and creates this blur of that subject, or you can create it manually by shaking you hands while taking a photo and finally when the shutter speed is too slow to be able to freeze the image. My favoured type of blurry photo is in city as theres always something happening and you will be able to get a wide range of different subjects in the photograph wherever you are. I also find images with one specific thing blurred and the rest not blurred very interesting as it feels like your adding two techniques into one photograph.
Bill Armstrong


Bill Armstrong is english based fine art photographer who works on a unique process which he makes portraits extremely out of focused with a camera focusing ring set at infinity. His series is called ' The Infinity Series' named after this process. What I like about his way of photographing portraits is how he completely covers the person in the image because this gives a sense of uncertainty toward who they actually are and look like. Additionally what I like about his photographs is how vibrant and bold the colours used in the image are. This sections the different subjects apart and creates a split in the image. In some cases this it the rule of thirds. On the other hand i would say his process does become very repetitive and its hard to create new images which don't follow the same aspects as previous photographs.
Uta Barth


Uta Barth is a German photographer who focuses on blurred photographs. She gives this impression which leaves most of the image blurred apart from a specific subject. This technique challenges the viewer to try to determine the cameras focus point and many times this creates the illusion of a very close-up image. What I specifically like about Barth's work is how her technique is very closely relate to a human eye. This is because when we focus are eyes on a specific subject the background gets completely blurred out and this is exactly the same as Barth's work. She also did another set of blurred photographs where she completely blurred out the whole image. This process is also interesting because it completely blokes out any vision of the image and makes the viewers struggle to work out whats the purpose and meaning behind the image. This theme of blurred images brings a very unique audience towards them who question the purpose and meaning behind and image which is hard to visualise. But I think thats the purpose of blurred images, to bring together people who have similar inquiries and questions about the images it's self.
My response ...


With my personal response to the photographers i tried following the same structure they used but putting a twist on mine to make them more personal to me. I would say my photographs heavily focus more on Uta Barths work rather than Bill Armstrong. This is because my photographs are more linked to realism which is also similar to Barth's photos. The way I changed mine however was more having a specific object or part of the image blurred instead of the whole images. But i did include a couple of images which do have the whole image blurred but have a certain part blurred was my focus throughout the project.
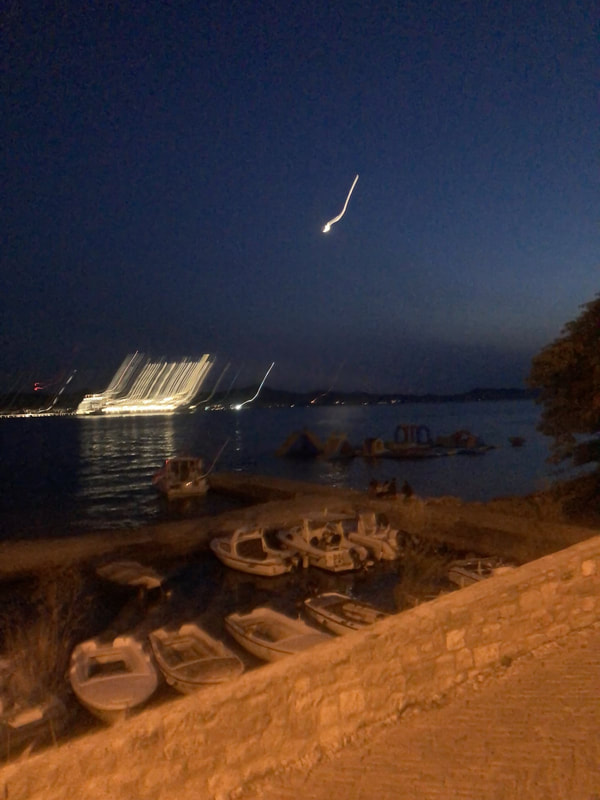
With this blurred process a lot of the time the photos become blurred by accident and the majority of them are by accident. But that what i love because the pictures become unpredictable. This was the case when i was on holiday in Zadar, Croatia and while i was on a night walk around the coast with my dad I was talking many photos of the beautiful city. However because it was very talk it distorted a lot of my images and this caused them to become vary blurred. Instead of deleting them I decided to keep them because they became more and more interesting because they came out really mysterious but completely by chance. With these images I also chose to edit them slightly to make them more blurred but specfic subjects such as the boat.
With this blurred process a lot of the time the photos become blurred by accident and the majority of them are by accident. But that what i love because the pictures become unpredictable. This was the case when i was on holiday in Zadar, Croatia and while i was on a night walk around the coast with my dad I was talking many photos of the beautiful city. However because it was very talk it distorted a lot of my images and this caused them to become vary blurred. Instead of deleting them I decided to keep them because they became more and more interesting because they came out really mysterious but completely by chance. With these images I also chose to edit them slightly to make them more blurred but specfic subjects such as the boat.
Dionne Lee Constructed Landscape
Drafts from Dionne Lee on Vimeo.
Dionne Lee is an American photographer who works with film, collages and videos to explore the ideas of power, survival and history all integrated into one. The video above show Dionne Lee cutting ripping and replacing different components and adding/overlapping them together. Every time she had made a collage with overlapping pictures she would start again, but she would continuously reuse these images and keep overlapping them. It was similar to a continuous cycle. What I also like about her process is the way she mixes different components which would never usually be mixed together and experimenting different ideas.
We did a similar process to Dionne Lee's video and we used photographs from national geographic magazines dating back to 1930s all the way up to the 2000s. I picked some of my favourite and photocopied them to get a collection of 10-12 images. I then cut out the unwanted bits and started to produce of overlapping and cutting. I made a video on time laps which made the finished product extremely fast and it turned out very well. I would improve it by making it slightly longer then 20 seconds because it was quite short and I could of integrated new picture to mix more concepts together.
We did a similar process to Dionne Lee's video and we used photographs from national geographic magazines dating back to 1930s all the way up to the 2000s. I picked some of my favourite and photocopied them to get a collection of 10-12 images. I then cut out the unwanted bits and started to produce of overlapping and cutting. I made a video on time laps which made the finished product extremely fast and it turned out very well. I would improve it by making it slightly longer then 20 seconds because it was quite short and I could of integrated new picture to mix more concepts together.
My response ...
With my response I tried the similar processes as the ones in the video with tearing images to create new images. I also followed the way after she has layered multiple pictures together she starts over and takes it away the different elements of different pictures. While I was filming this I used a phone holder to get an aerial view of what I was doing which i think worked very well. Additionally I also set my phone on time lapse which captures my footage at select intervals and speed up the video after you have finished shooting.
This worked very well and I was very happy with the results of the video process however that did mean that the video was only 20 seconds long. So if I was to attempt this again I would make it much longer and more complex adding more elements and pictures to the process. What I liked most of all was the freedom and pleasure to feel free to do whatever I wanted with my images. There was also the likability that if you made a mistake you can play it off and actually thats mistake can lead to a new branch of ideas and landscapes.
This worked very well and I was very happy with the results of the video process however that did mean that the video was only 20 seconds long. So if I was to attempt this again I would make it much longer and more complex adding more elements and pictures to the process. What I liked most of all was the freedom and pleasure to feel free to do whatever I wanted with my images. There was also the likability that if you made a mistake you can play it off and actually thats mistake can lead to a new branch of ideas and landscapes.
Photography Trip - 29/09/23


Dafna Talmor


Dafna Talmor is an artist based in London and is the next artist we are focusing on with our new project. Dafna's work focuses on taking out big sections of landscapes and constructs them differently to create new patterns and essentially a new photograph. She does this to manipulate them into something new and out of the ordinary. She does this in many ways; she uses glue, a scalpel and even sometimes fire to construct it differently to its original image. I like her process of work as she layers the photography so uniquely that its hard to image the original image. I think it can also demonstrate mystery to the viewers as they are sometimes unaware of the purpose and meaning behind the image they have created. Our task was to complete the same process as she does with some of our personal landscape photographs. While we were on our school trip around Peckham in South East London I managed to collect a variety of images which I later used in my process of deconstructing the landscape. Peckham is home to a multicultural community filled with art, graffiti and unique people. This was incredibly helpful as I was able to gather so many interesting photos while on our walk around.
A few weeks later I collect 6 of my favourite photos and I wanted to insure they were completely different from each other so I had some variety to chose from. This included some photos of fruits some photos of people but the majority were of unique landscapes. Once I had collected them I had to print them off in the smallest size possible and then converted that onto the acetate. After that we were free to manipulate our landscapes in any way we wanted. To start with I struggled taking out specific aspects of the pictures and I was just layering them with coloured transparency gels and wants fully developing them. However after my third attempt I really started to convert them into a completely new image which was changed from the original photograph. I used a cutting board and scalpel to try scraping off section of the image and cutting big chunks out of the image. After cutting out big sections I under-layered a second image over the original image to overlap them and incorporate two images in one. With my final images in cut two separate images into four quarters and them mixed them together two further manipulate them. I also used an ink pen and drew over the image and once I celle-taped over them in created small blobs on the images.
Once I had finished I further developed 2 of my images which I wasn't very happy about and wanted to make them look more unique. The first image I decided to develop was the first image I developed and that was the one with a rainbow pattern. With this image I thought it was too simple and very common to other peoples work. Thats why I decides to use a scalpel to scratch of some of the image. The first thing I changed was scratching off a boarder of the image creating a secondary image within the original one. The second development I made was using glue to cover one side of the image and then covering in with celle-tape. When doing this I was unaware of what the results would look like and I was just exploring the possibility of what might happen. This was the whole point of doing this work was to experiment and try new thing, so I was happy I was expressing this through my work. When I put the slide into the projector i instantly realised that one side one the image was blurry and the other wasn't. This was very new and I thing it added a lot of character to the image. With my second further development of an image I chose to develop the images of exotic fruits which I had previously just overlapped with sections of gels. This was very bland and I wanted to completely change it to a more developed and completely different image. With this image I wanted to try a new process with I hadn’t tried before and push out my experiments further. When our teacher was showing us some examples I saw one which had string in it and i thought it was a really good way of dividing the image up into different sections. When looking round the classroom I was unfortunately unable to actually find any string for my image however I instead found a bookmark which was a string type material and cut off a small section from it to use for my image. The bit I cut off was some red string but all the bits were all coming apart. So I quickly put it on my image and overlapped it with scrupled up celle-tape because i thought it would should a very unique patterns. I think it turned out very well in the end and was very unique to other people examples I saw.


|


|
